ENGR 100-600 | University of Michigan
Design-Build-Test-Communicate Demo
This class is a Design-Build-Test-Communicate (DBTC) class. But what do we mean by this? Let’s do a quick example – related to your future underwater vehicles!
Throughout the semester, we’ll be learning about the types of design constraints and user requirements that we need to keep in mind when designing a type of underwater vehicle called a Remotely Operated Vehicle (ROV). There are three general areas of consideration:
- Controls – how will you “drive” this ROV?
- Hydrodynamics – how will the ROV behave as it moves through water?
- Manufacturing – how will you actually be able to build this ROV?
In this class, we’ll mostly be building skills in these areas through experiential learning – meaning that we’ll do a lot of hands-on experiments and you start to build some intuition just through seeing what happens. Let’s start by covering some basic ideas about controls, hydrodynamics, and manufacturing, and then do a short activity about one of these conceptual areas.
Background
Read through the background information below and then be ready to do a fun activity at our first lecture!
Controls
All underwater vehicles have six degrees of freedom, meaning they can move in six different ways (see Fig). The different motions are:
- Surge - forward/backwards
- Sway - left/right
- Heave - up/down
- Roll - tipping left/right
- Pitch - rotating up/down (or forwards/backward if that makes more sense to you)
- Yaw - twisting left/right

Sometimes a vehicle moves solely in one way (e.g. forwards = surge), and sometimes it moves in two or more ways simultaneously (forward and turning left = surge + yaw).
In general, ROV controllers have:
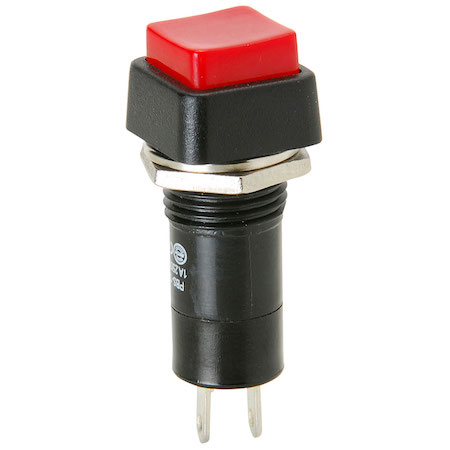
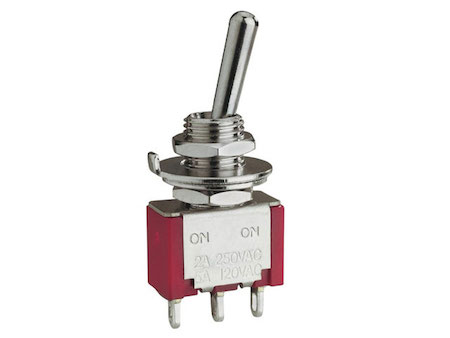
- Switches and/or buttons to control things on the ROV
- A tether to the controller or an antenna so the controller can communicate wirelessly with the hypothetical ROV
- A hole (or other pass through) for cables, ports, etc.
Examples of the buttons and switches we will use for this course are shown in Fig. Buttons can do “on/off” behavior (e.g. turning a thruster on or off). Toggle switches can do “on/off/reverse” behavior.
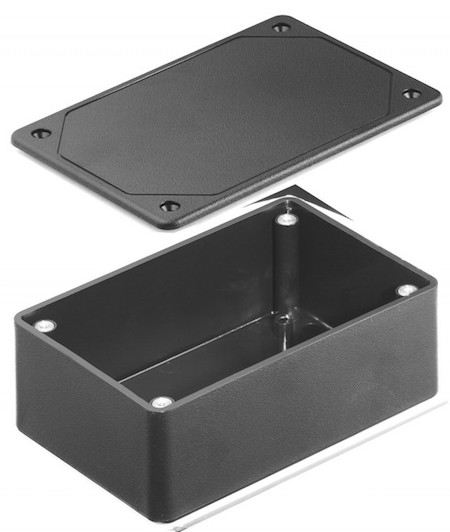
The ROV controllers that we make in this course are hand-held. Controllers for larger ROVs are often built-in workstations that might look more like the dashboard of a car, bus, or airplane. Our controllers start with a black plastic box, similar to what is shown in Fig. It is relatively easy to drill out holes in these boxes for the buttons, switches, access ports, etc. that are needed for the controller.
Your job is to make a prototype controller that will let you drive an ROV. A limitation on your controller for this activity is that you can only directly control four out of the six degrees of freedom. Your team needs to decide which four directions you are going to control, then build the controller out of legos. Include an antenna on your controller and two different holes so that cables can be passed inside the controller. Get creative to make “switches” and “buttons” out of legos! Label your buttons and switches with what they do using masking tape and a marker.
Hydrodynamics
Hydrodynamics is a combination of two word parts: [hydro = water] and [dynamics = movement.]
In our course, you will be concerned with how water moves past your ROV and how that will then affect the ROV’s maneuverability.
Streamlines are a visual representation of how a fluid moves past an object (see Fig). Far away from the object, the fluid moves straight ahead. But closer to the object, the fluid has to move around the object.
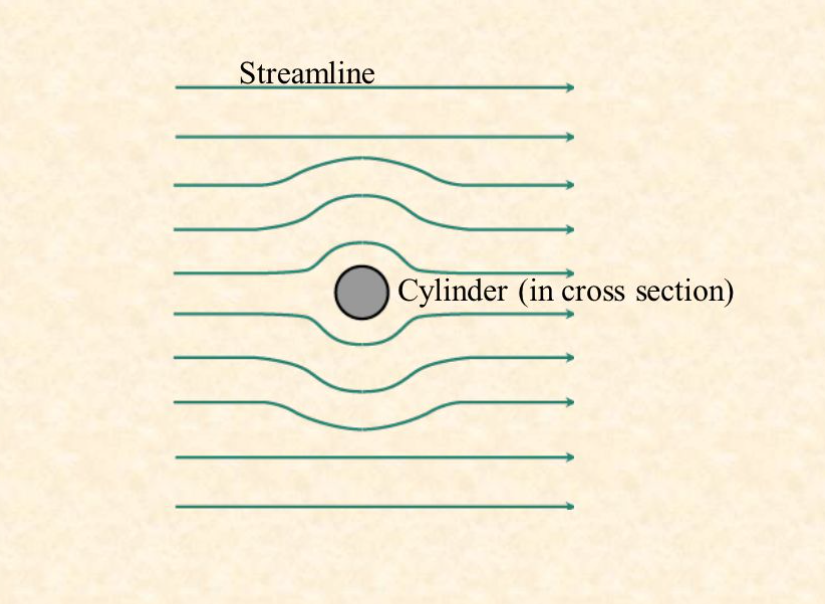
When the fluid has to change direction, its speed slows down and its pressure increases. This change in pressure creates drag, a force that pushes the object back. Differently shaped objects will make the fluid move around them in different ways (Fig).
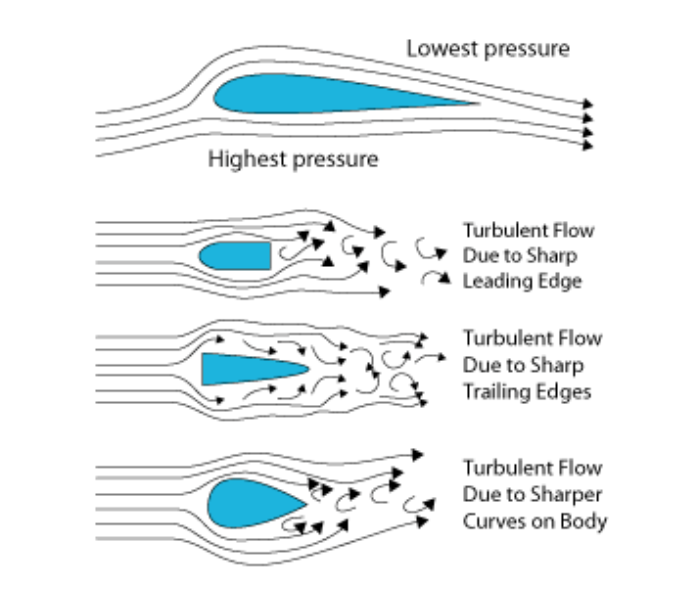
Pressure is higher when the streamlines are closer together because they have to move around an object.
Anywhere the flow is disturbed (meaning, where the streamlines are not straight) contributes to the object’s drag. So, the shape and orientation of the object is really important (Fig). The center of all this changed pressure in the fluid flow is called the center of pressure (sometimes called the center of drag).
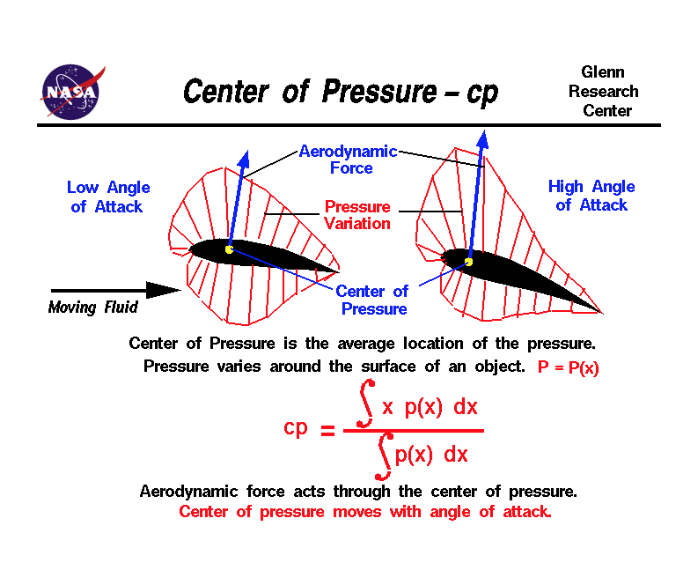
In general, the center of pressure will be located closer to areas of higher pressure (e.g. closer to the forward part of an object). If you have two objects that are connected together, the center of pressure might actually be somewhere between the objects.
Your job is to use dominoes to create streamlines around a scale model of an ROV. Start with one streamline on either side that is far enough away for the streamlines to be straight. Then, create one streamline on either side that goes close around the ROV. Fill in the rest of the streamlines however you think best, using Fig – Fig as visual guides.
Manufacturing
ROVs consist of a sturdy frame to which one attaches a multitude of parts: payloads, cameras, thrusters, buoyancy, etc. The design of the frame dictates limitations on maneuverability, and maneuverability needs can influence design decisions about the frame.
Another group (i.e. Laura and her then-seven-year-old son) has made the prototype ROV shown in Fig.
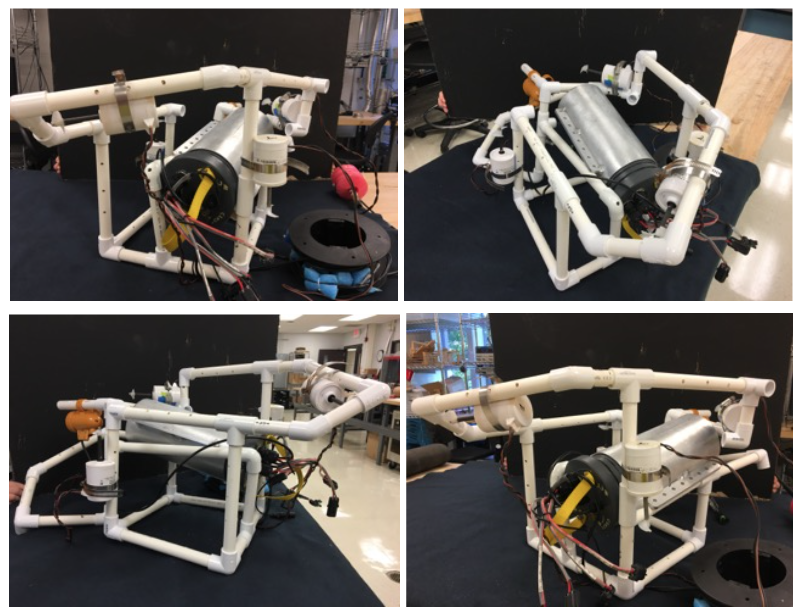
As you can see, it has two main problems:
- the frame is inefficient – it’s too complicated/uses too many parts, which means it’s expensive
- the thrusters, particularly the propellers, are not protected from the environment (ocean bottom, seaweed, wires and cables floating around during operation, etc.)
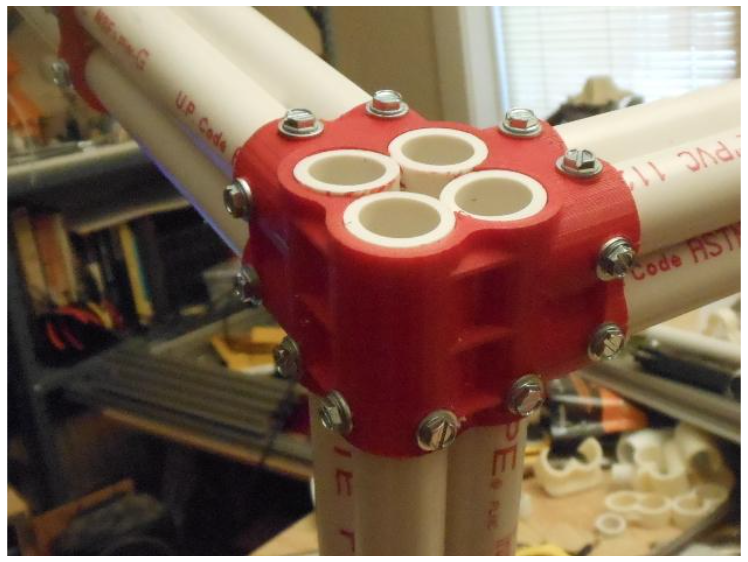
It is easy to design an ROV on the computer. It is sometimes hard to bring that design to life using parts that are commercially available. Things like PVC, aluminum, and steel come in standardized lengths, widths, and fittings. This makes them cheaper to manufacture and more reliable during assembly. But sometimes designs can be more robust, more sustainable, less expensive, and overall better if custom parts can be used. Rapid prototyping, such as 3D printing, can be used to test out whether a custom part would be a good design choice for a new prototype. An example of a 3D printed PVC connector is shown in Fig.
Your job is to redesign this ROV frame to address the two major problem areas. Use the straws and connectors to model the PVC of an ROV frame. If desired, you may use the clay to create custom parts for your ROV. Attach the thrusters (white cups with “propellers”) and payload (red cup) using tape.
DBTC Activity
We will assign your group one of the following DBTC activities:
| DBTC Concept | Controls | Hydrodynamics | Manufacturing |
| Design (10min) |
a handheld controller that will let a person drive an ROV; can only directly control 4 out of 6 degrees of freedom (surge, sway, heave, roll, pitch, yaw); can use buttons and switches | a visual that shows how water flows around an ROV to help determine center of drag (aka center of pressure) | an improved ROV design that uses less material and/or fewer parts while still protecting the thrusters from damage |
| Build (10min) |
prototype of the controller using legos; include labels! | prototype using dominoes falling as the "streamlines" around the ROV | prototype using less provided material to create a new part(s) for the prototype that are not available commercially |
| Test (5min) |
pass the prototype around the group and let everyone pretend to drive the ROV; take a video of someone "using" the controller; make notes on what people think | use the rod to start all lines of dominoes falling at once; record video; visually estimate where the center of drag is; make notes on what people think | drop the new prototype from ~2" above table; observe whether thrusters are damaged; repeat damage test with prototype in different orientations; make notes on what people think |
|
example video:
video credit: Dave Slavicek If the video doesn't load, try opening this webpage in a different browser. |
example video:
video credit: Casey Alford If the video doesn't load, try opening this webpage in a different browser. |
example video:
video credit: Laura Alford If the video doesn't load, try opening this webpage in a different browser. |
|
| Communicate (10min) |
make 1-2 slides: why you chose this design; picture(s) of the prototype; results of testing; conclusion on how well the prototype met the design needs | make 1-2 slides: why you chose this design; picture(s) of the prototype; results of testing; conclusion on how well the prototype met the design needs | make 1-2 slides: why you chose this design; picture(s) of the prototype; results of testing; conclusion on how well the prototype met the design needs |
This is a fast paced activity! Don’t try to make your prototype be perfect! It won’t be perfect and that’s okay!
Don’t spend too much time on any one aspect of this activity. We need to be done and cleaned up by the end of lecture. :)
For your slides, include:
- A title slide stating the activity your group did and the names of the people in your group
- A slide with a picture of your prototype and some labels pointing out important things and why they are important (this slide might be good to make before you do the testing!)
- A slide with the results of your testing (video plus words and/or pictures) and your conclusion as to how well the prototype met the design needs.
When your slides are finished, save them as a .pdf file and submit the .pdf to Canvas.
Everyone must submit the .pdf version of your slides to Canvas. We want to make sure everyone knows how to do this. In future group assignments, only one person has to submit the group’s work.
At the end of the activity, one of the instructors will come around and someone on your team will do a 30 second presentation using the slides you created. Don’t worry: you can do your presentation low-key and we will be suitably high-key excited about it.