ENGR 100-600 | University of Michigan
ROV Controls Activity
To help get a high-level understanding of how to control ROVs, we are going to do a hands-on demonstration to show how your design choices will affect the abilities of your ROV. You will get some more experience controlling ROVs in lab this week.
Background
Here’s a video that shows an ROV doing an underwater inspection, similar to what your ROV will do at the competition. To design your ROV, you need to have an idea of the different ways it can move underwater (known as degrees of freedom) and how the placement of thrusters and limitations of the electronics will impact the ROV’s maneuverability. The following sections provide a little bit of background information on these concepts.
Degrees of Freedom
All underwater vehicles have six degrees of freedom, meaning they can move in six different ways (see Fig). The different motions are:
- Surge - forward/backwards
- Sway - left/right
- Heave - up/down
- Roll - tipping left/right
- Pitch - rotating up/down (or forwards/backward if that makes more sense to you)
- Yaw - twisting left/right

Sometimes a vehicle moves solely in one way (e.g. forwards = surge), and sometimes it moves in two or more ways simultaneously (forward and turning left = surge + yaw).
Placement of Thrusters
Where you place your thrusters will decide which degrees of freedom your ROV can move in independently and how fast it can move in those degrees of freedom. Fig illustrates these relationships.

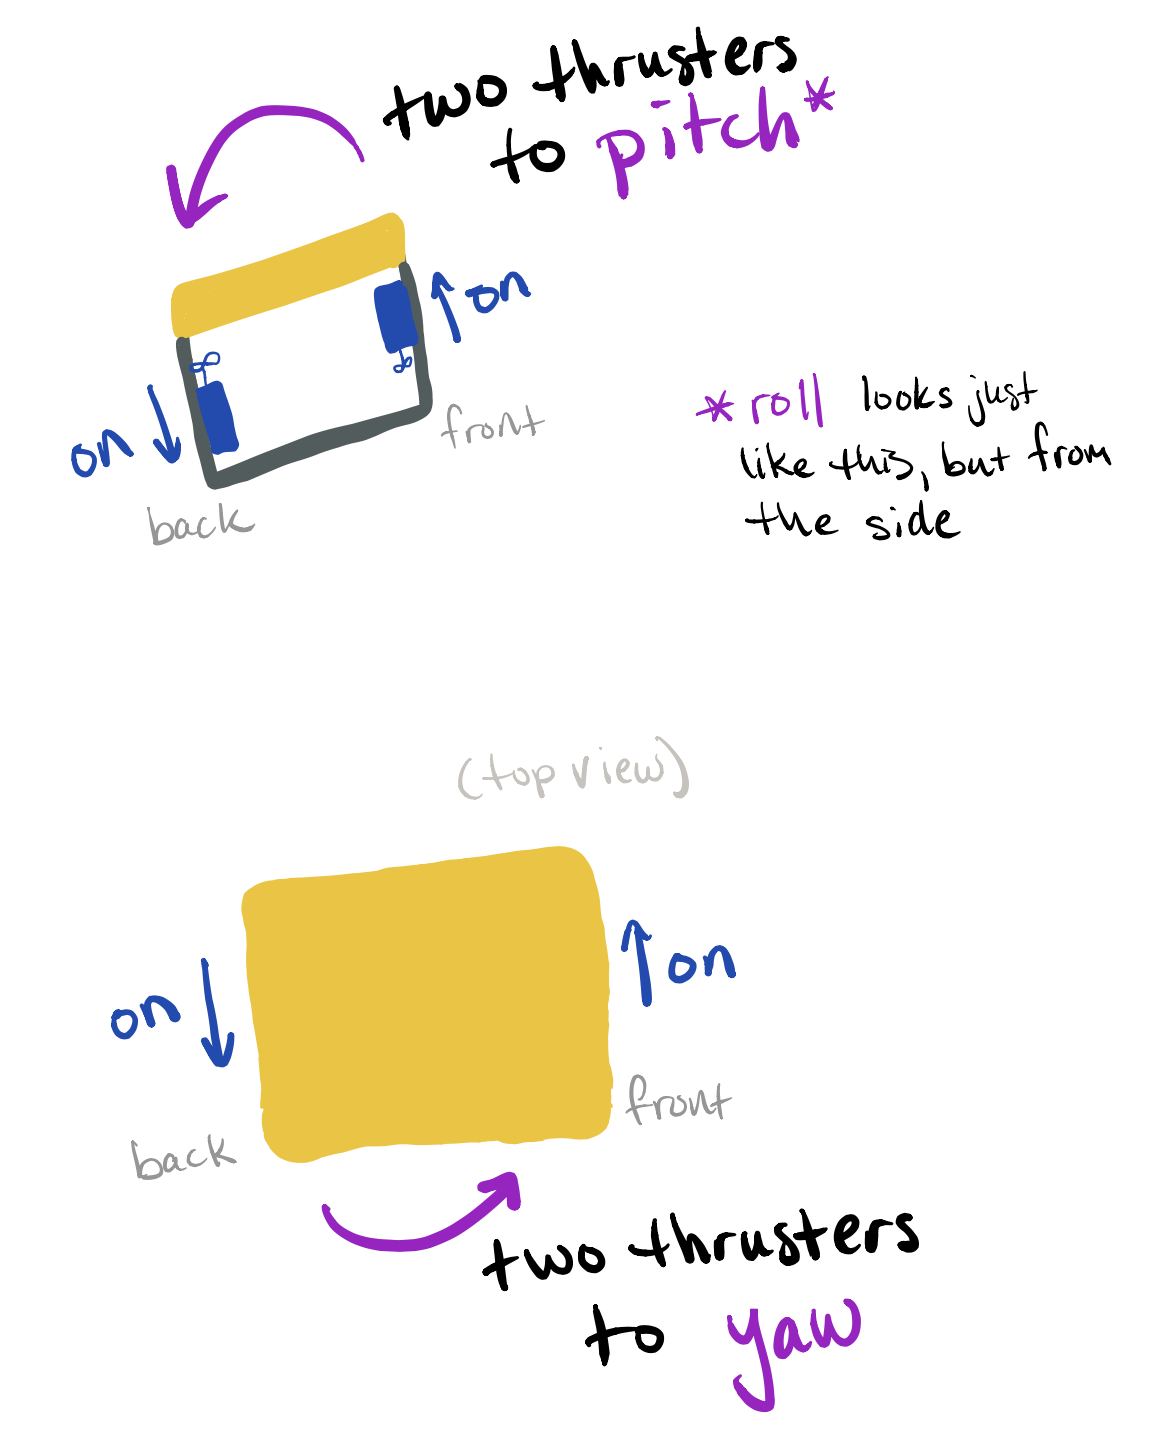
Some general guidelines for how the placement of thrusters impacts your ROV’s maneuverability are:
- Pure translation (surge, sway, heave) can be done with one thruster
- Pure rotation (roll, pitch, yaw) needs at least two thrusters
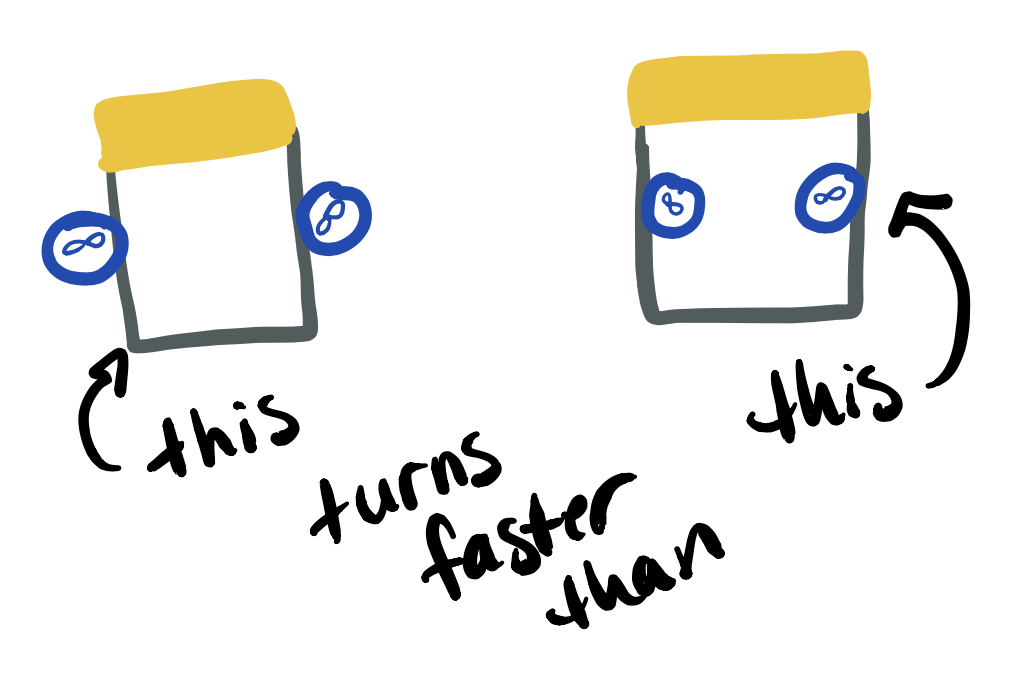
- The farther apart two thrusters are, the faster they can rotate your ROV
Limitations of Electronics
In general, ROV controllers have:
- Switches and/or buttons to control things on the ROV
- A tether to the controller or an antenna so the controller can communicate wirelessly with the hypothetical ROV
- A hole (or other pass through) for cables, ports, etc.
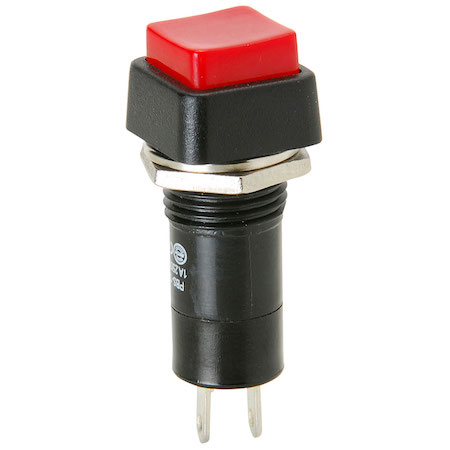
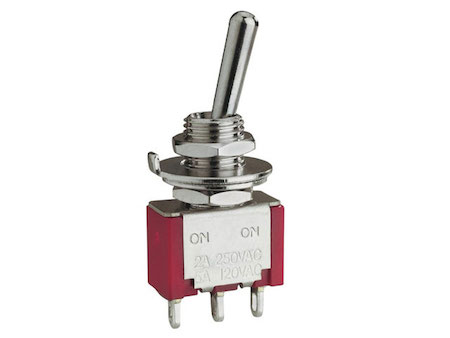
Examples of the buttons and switches we will use for this course are shown in Fig. Buttons can do “on/off” behavior (e.g. turning a thruster on or off). Toggle switches can do “on/off/reverse” behavior.
The ROV controllers that we make in this course are hand-held. Controllers for larger ROVs are often built-in workstations that might look more like the dashboard of a car, bus, or airplane. Our controllers start with a plastic box, similar to what is shown in Fig.
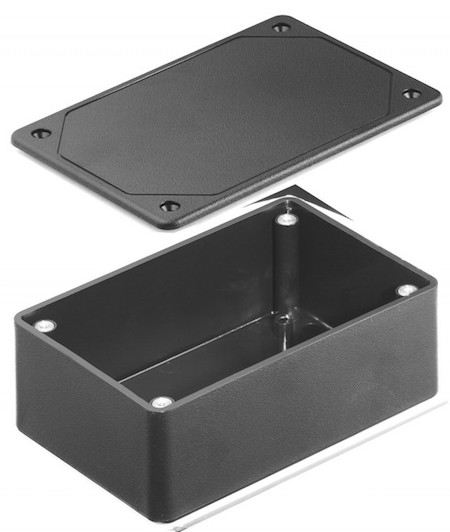
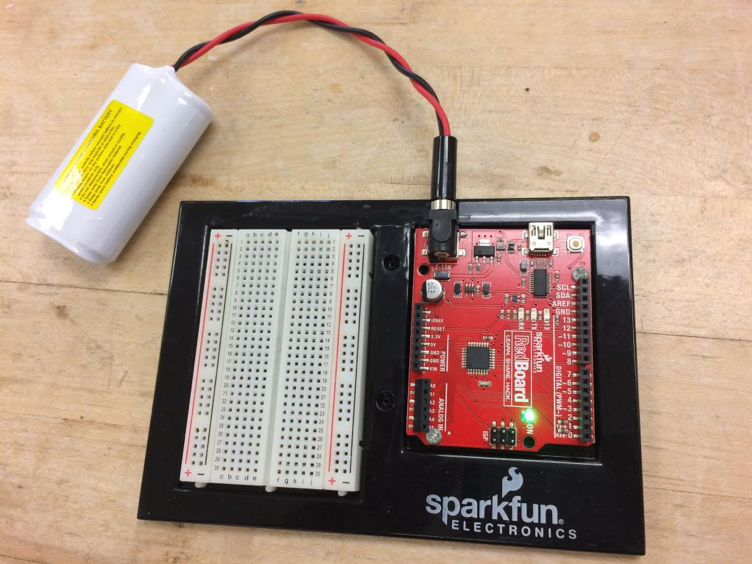
It is relatively easy to drill out holes in these boxes for the buttons, switches, access ports, etc. that are needed for the controller. Inside the controllers, an Arduino board and a breadboard (Fig) are mounted to provide the base electronics of the controller (its “brain” if you will). The buttons and switches are then connected to the breadboard, completing the controller.
Your ROV’s payload has a circuit board inside that processes up to eight signals from your controller’s Arduino board. The base configuration of the Arduino board assumes the eight signals correspond to the “on” and “reverse” positions of each of the four thrusters (4 thrusters x 2 positions = 8 signals). A button can close one circuit, thus sending one signal, e.g. “on” or “reverse” for a thruster. A toggle switch can close two separate circuits, e.g. “on” or “reverse” for a thruster.
An ideal ROV might be one that can move in all degrees of freedom simultaneously. But this might require up to nine thrusters and 18 control circuits! And you only have four thrusters and eight circuits. Because you are limited by both number of thrusters and number of circuits, you will need to decide carefully which degrees of freedom you will choose to control directly.
Tasks
Your group is going to have two tasks:
- Create an obstacle for an ROV to maneuver around
- Determine how to drive an ROV around the obstacle
Take no more than 5 minutes to complete each task – this is a fast activity!
Task 1: Obstacle (5 min)
Your group will be given a type of obstacle to create. The types of obstacles are:
- Something the ROV has to go over
- Something the ROV has to go under
- Something the ROV has to go between
- Something the ROV has to circle around
- Something the ROV has to pass to the left
- Something the ROV has to pass to the right
To create your obstacle, you may use chairs, tables, yourselves, whatever you can think of! Just do it quickly because you only have 5 minutes! Place your obstacle near the head of your table so that we have a roughly-ring-shaped obstacle course around the room.
Task 2: ROV Control (5 min)
Your group will be given a “controller” that says what degrees of freedom your ROV can move in (electronics limitation) and how fast or slow each of those motions can be performed (thruster placement). For example, your controller might look like one of these:
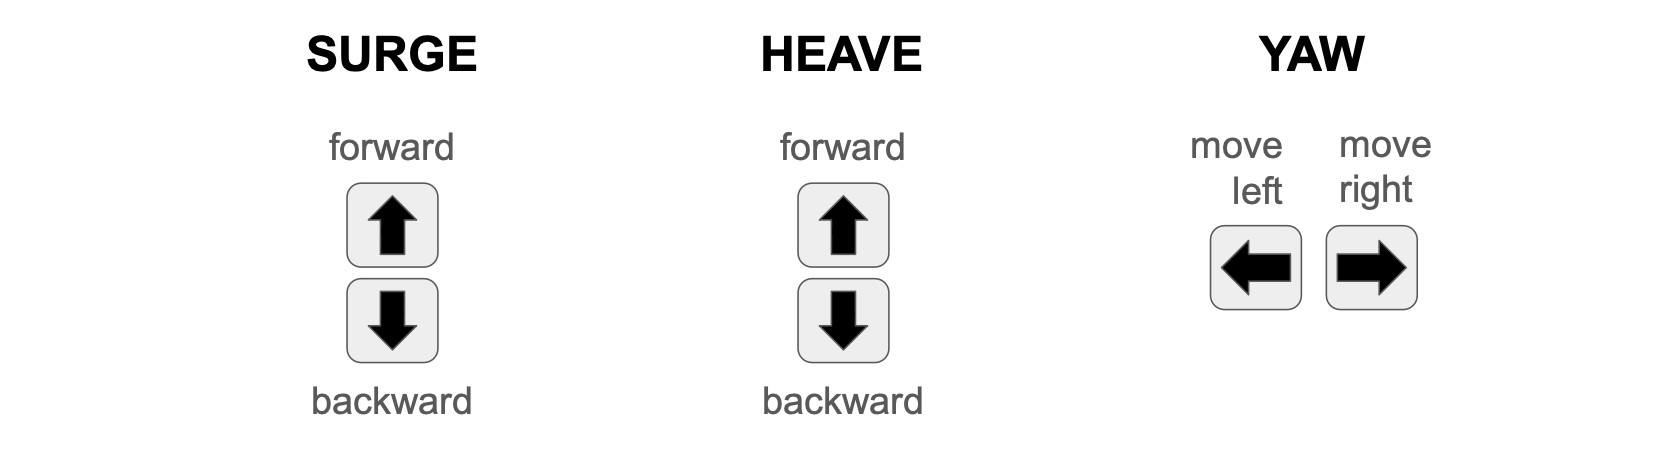
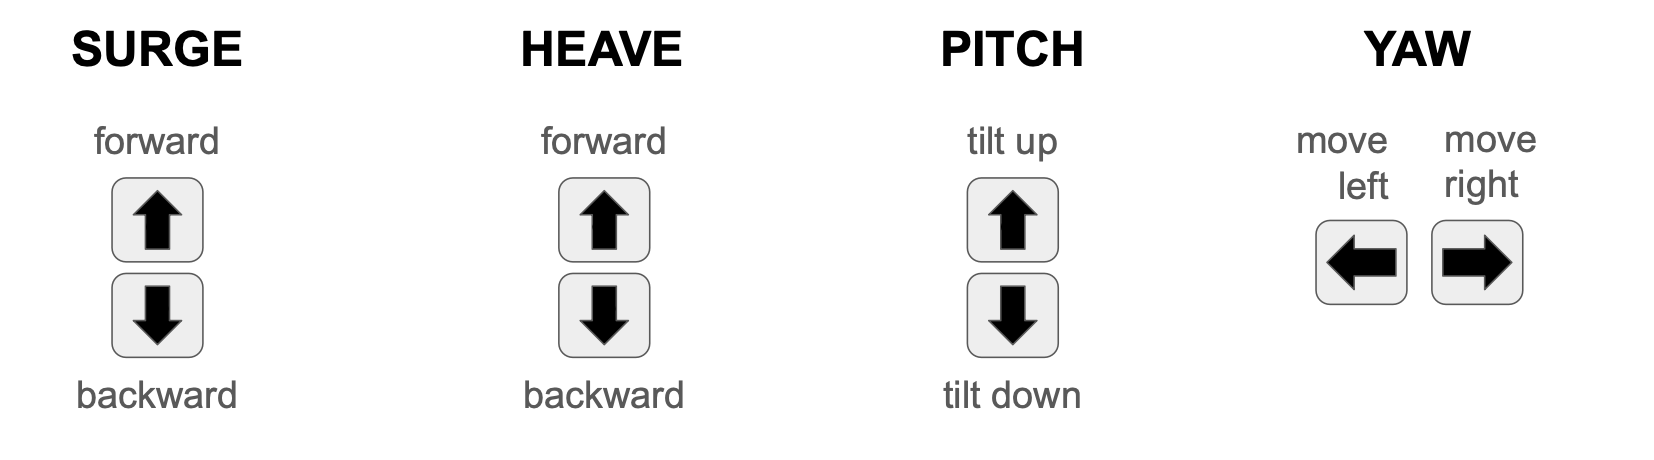
Now, Laura is going to be your group’s “ROV” and she is going to be tethered to Robin who will be her “buoy”. Look at your “controller” and practice telling your ROV how to move. Be precise so the LauraROV will know what to do! Some example commands, based on the sample controller above, are:
- Surge forward! (Laura would walk forward)
- Sway right! (Laura will shuffle sideways)
- Heave down! (Laura will drop down)
- Pitch down! (Laura will do her best to rotate her body so she faces more down)
- Turn camera left! (Laura will turn her head, with the camera, to the left)
You don’t have to use exactly these commands; figure out what phrasing you think the LauraROV will be able to understand the easiest. :) But be quick! You only have 5 minutes to figure this out.
Testing Your ROV (5 min)
When the 10 minutes have passed (5 minutes for building the obstacle + 5 minutes for figuring out your ROV controller commands), Laura will start at a randomly selected group. That group will control the LauraROV using its ROV controller commands. When the LauraROV makes it past the first obstacle, she will go to the next and the next, etc. until all obstacles have been tried.
As the LauraROV tries to tackle the different obstacles using different ROV controllers, take note of what obstacles she can get around easily and which ones are harder given her ROV abilities (degrees of freedom + thruster placement + electronic limitations).
Debrief (5 min)
- After testing is completed, return all items used for the obstacle to where you got them from.
- As a group, discuss what you learned from this experiment:
- What type of obstacles were the easiest to get past?
- What type of obstacles were the hardest?
- Which controller commands seemed to be the most straightforward?
- Which controller commands seemed most useful to have?
- Other things that you noticed